
Gotcha! You want the ultimate, in-depth guide to making Keto Garlic Chicken Fried Rice—a deep dive into everything from ingredient breakdowns to pro cooking tips and variations? Buckle up, because we’re about to turn a simple 20-minute dish into a masterclass in keto stir-frying. 🚀🔥
The Best Keto Garlic Chicken Fried Rice
Why You’ll Fall in Love with This Recipe
If you love fried rice but are trying to stick to a keto-friendly, low-carb lifestyle, this Garlic Chicken Fried Rice is going to be a game-changer. It has all the flavors of takeout—savory garlic, juicy chicken, umami-packed soy sauce, and fluffy scrambled eggs—without the carb-heavy rice that spikes blood sugar.
Here’s what makes this recipe so amazing:
✅ Super Quick & Easy – Ready in just 20 minutes!
✅ Low-Carb & Keto-Friendly – Only 5g net carbs per serving.
✅ High in Protein – Helps keep you full and supports muscle recovery.
✅ Meal-Prep Approved – Stores well and reheats beautifully.
✅ Family-Friendly – Even non-keto eaters will love this dish!
The Secret to Perfect Keto Fried Rice
Traditional fried rice uses white rice, which is high in carbs and not keto-friendly. Instead, we swap it for cauliflower rice, which absorbs all those amazing flavors while keeping the dish low-carb.
The key to making keto fried rice taste as good as the real thing comes down to three things:
1️⃣ Perfecting the cauliflower rice texture – You want it light, fluffy, and not soggy.
2️⃣ Maximizing flavor – Since cauliflower rice is mild, we amp things up with garlic, soy sauce, and sesame oil.
3️⃣ Getting the right balance – The right ratio of chicken, eggs, and seasoning ensures that every bite is satisfying.
Now, let’s break it down step by step. 👇
Ingredients You’ll Need
(Serves 4)
🥩 Protein:
- 1 lb chicken breast or thighs (diced) – Use thighs for extra juiciness or breasts for leaner protein.
🍚 Low-Carb Rice Substitute:
- 2 cups cauliflower rice (fresh or frozen) – The star of the dish!
🧄 Aromatics & Seasonings:
- 4 cloves garlic, minced – The more, the better!
- 2 tbsp butter (or avocado oil) – Adds richness and helps with browning.
- ½ tsp salt & ¼ tsp black pepper – Enhances the overall flavor.
- ¼ tsp red pepper flakes (optional) – For a subtle kick.
🥚 Eggs & Umami Boosters:
- 2 eggs, lightly beaten – Essential for that classic fried rice texture.
- 2 tbsp soy sauce (or coconut aminos for soy-free) – Umami-packed goodness.
- 1 tsp sesame oil – A little goes a long way in enhancing flavor!
🌿 Garnishes & Extra Flavor:
- 2 green onions, sliced – For a fresh, slightly spicy finish.
- 1 tsp sesame seeds (optional) – Adds crunch and nuttiness.
Step-by-Step Cooking Instructions
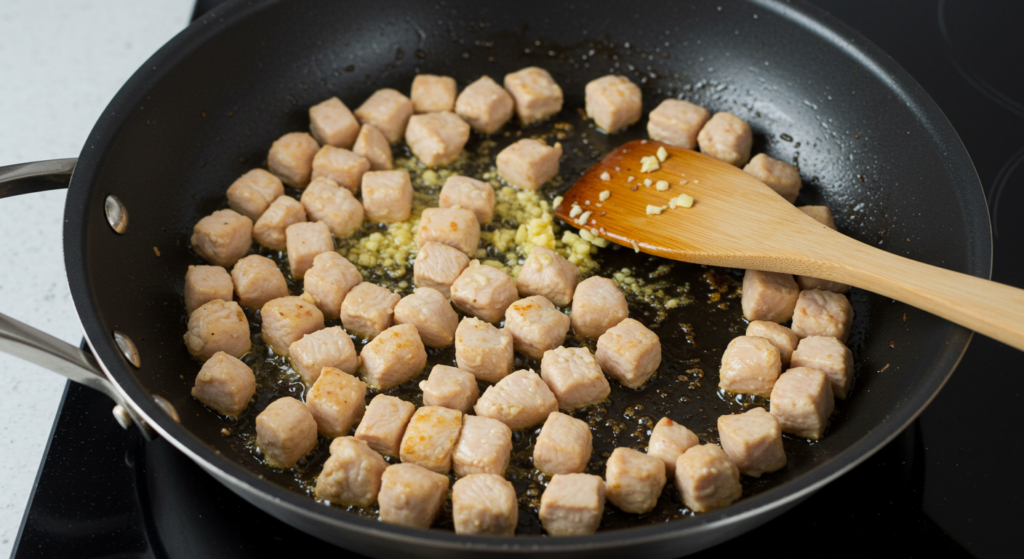
Step 1: Cook the Chicken
🔥 Start with a hot pan! A wok or a large skillet works best because it allows for even cooking.
- Heat 1 tbsp butter (or oil) in the pan over medium-high heat.
- Add minced garlic and sauté for 30 seconds until fragrant.
- Toss in diced chicken and season with salt and black pepper.
- Cook for 5-7 minutes until golden brown and cooked through.
- Remove the chicken from the pan and set aside.
💡 Pro Tip: Want restaurant-style tenderness? Marinate the chicken in 1 tsp soy sauce + ½ tsp sesame oil for 10 minutes before cooking.
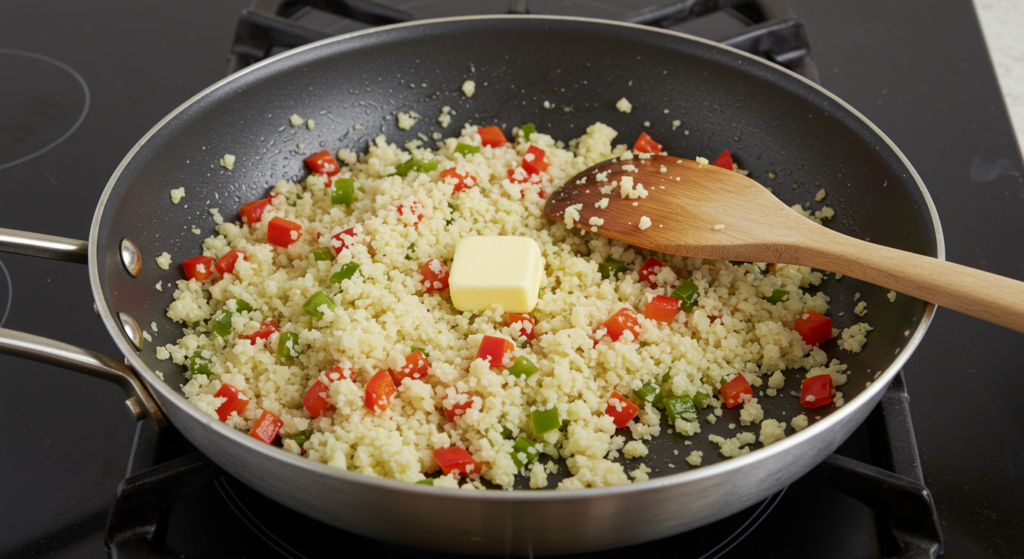
Step 2: Sauté the Cauliflower Rice
- In the same pan, add the remaining 1 tbsp butter.
- Toss in cauliflower rice and stir-fry for 3-4 minutes.
- If using, add bell peppers for extra crunch and color.
💡 Pro Tip: If using frozen cauliflower rice, let it cook a little longer to remove excess moisture. Nobody wants soggy fried rice!
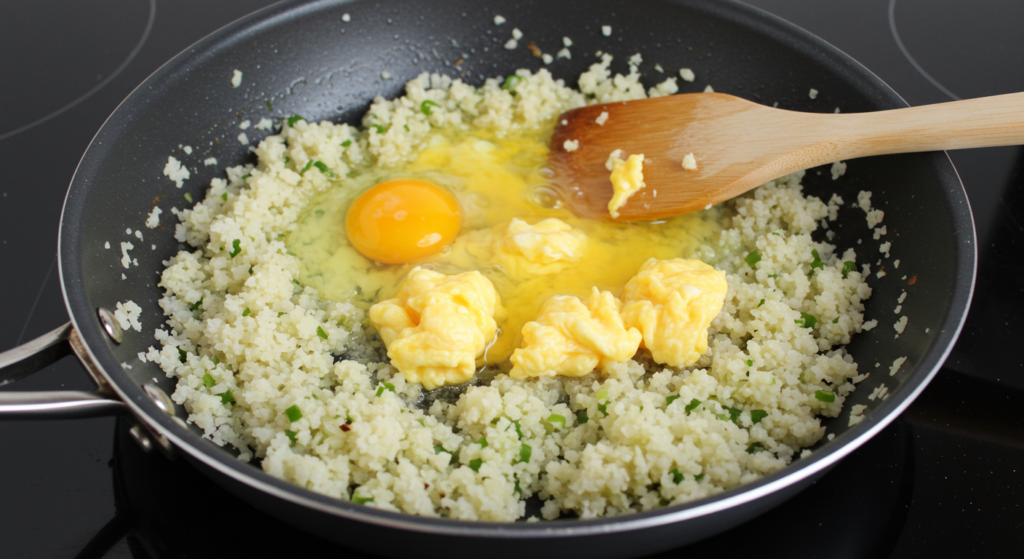
Step 3: Scramble the Eggs
- Push the cauliflower rice to one side of the pan.
- Pour in beaten eggs on the empty side.
- Let them cook for 30 seconds, then scramble gently.
- Once set, mix the eggs with the cauliflower rice.
💡 Pro Tip: Keep the eggs fluffy by cooking them over medium-low heat and stirring gently.
Step 4: Bring It All Together
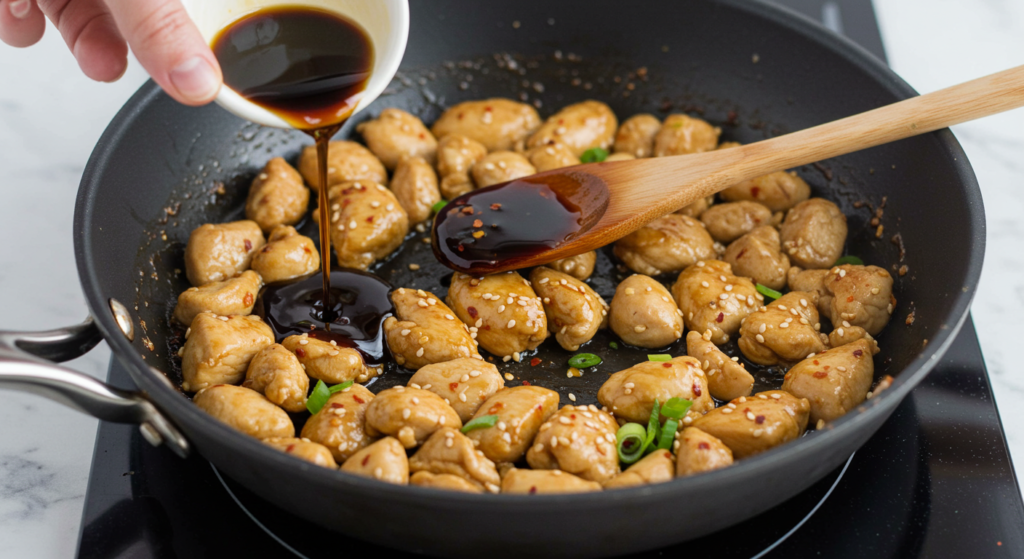
- Add the cooked chicken back into the pan.
- Pour in soy sauce, sesame oil, and red pepper flakes.
- Stir everything together and cook for another 1-2 minutes.
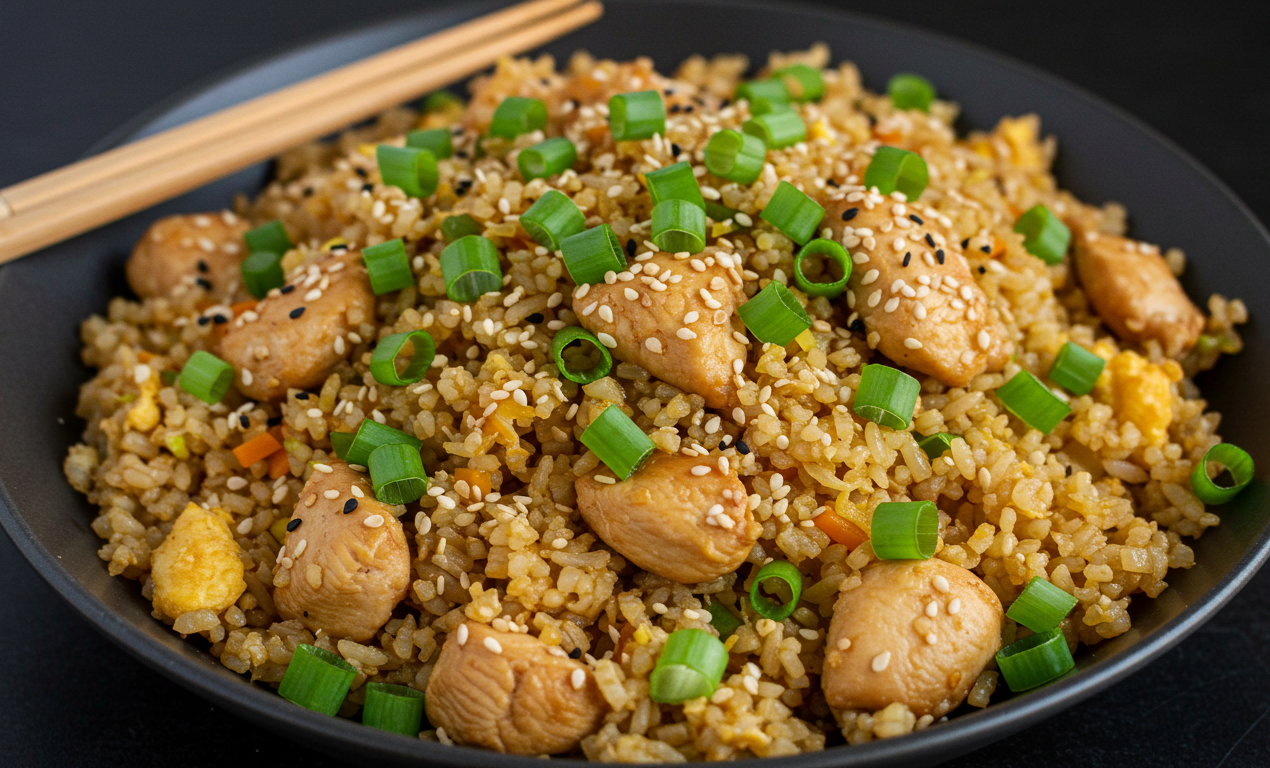
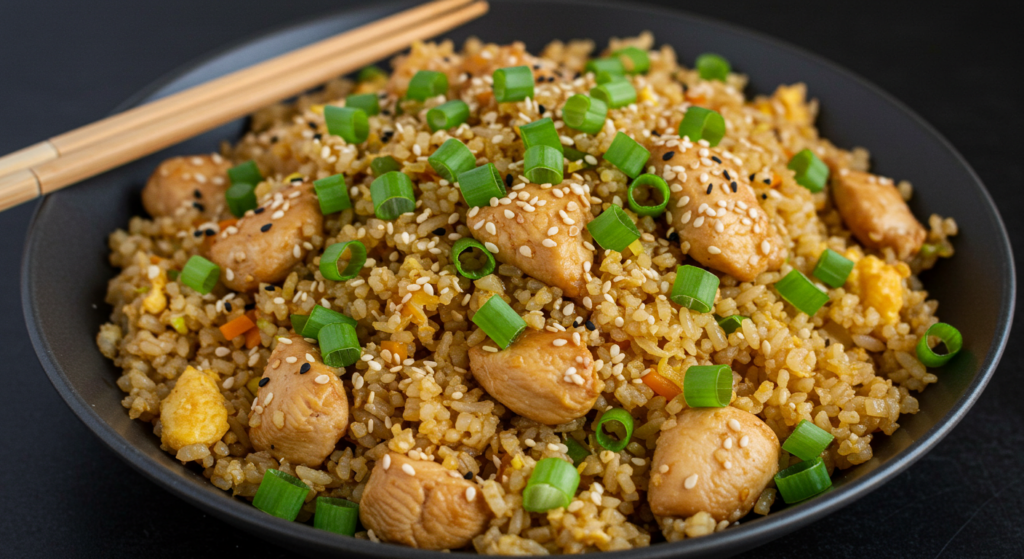
Step 5: Garnish & Serve
- Sprinkle with green onions and sesame seeds.
- Serve hot and enjoy your keto garlic chicken fried rice!
💡 Pro Tip: Want extra crunch? Add chopped roasted peanuts on top!
Keto Fried Rice Variations
Feeling adventurous? Try these fun twists on the classic recipe:
🌶️ Spicy Version: Add 1 tsp sriracha or drizzle with chili oil.
🥓 Bacon Lover’s Version: Swap chicken for crispy bacon.
🍤 Shrimp Fried Rice: Replace chicken with shrimp for a seafood twist.
🥦 Veggie-Packed Version: Add zucchini, mushrooms, or broccoli.
Storage & Meal Prep Tips
Fridge: Store in an airtight container for 3-4 days.
Freezer: Freeze in portions for up to 2 months.
Reheat: Microwave for 1-2 minutes, stirring halfway through.
💡 Meal Prep Hack: Cook a double batch and store individual portions for easy grab-and-go meals!
Nutritional Breakdown (Per Serving)
- Calories: ~280
- Protein: ~30g
- Fat: ~15g
- Net Carbs: ~5g
🎯 Perfect for keto dieters looking for a high-protein, low-carb meal!
Final Thoughts
If you miss takeout-style fried rice, this keto version is a total game-changer. It’s packed with garlic, loaded with protein, and perfectly satisfying—all while keeping carbs low.
Let me know if you try it! 🥢🔥