
Ingredients for the Filling
- 24 oz (680 g) cream cheese, softened
- 1 cup sugar
- 3 eggs
- 1 cup sour cream
- 2 tablespoons cornstarch
- 1 teaspoon vanilla extract
- 1 tablespoon lemon juice
How to Prepare the Crust
Start by preparing the base that will hold your cheesecake bars together. Mix the crushed biscuits with melted butter, sugar, and vanilla until the texture resembles wet sand. Press this mixture firmly into the bottom of your baking pan, making sure the layer is even and compact. A flat-bottomed cup works well for smoothing and tightening the crust.
Bake the crust for about 10 minutes to help it firm up and enhance the flavor. Remove it from the oven and allow it to cool slightly before adding the filling.
Preparing the Cheesecake Filling
The creamy filling is what makes these bars unforgettable. Begin by beating the softened cream cheese until smooth, removing any lumps. Add the sugar and continue mixing until the texture becomes silky. Incorporate the eggs one at a time, mixing briefly after each addition to avoid over-whipping. This keeps the filling dense and prevents cracks.
Add sour cream, vanilla extract, cornstarch, and lemon juice. These ingredients enrich the flavor and give the cheesecake its perfect structure. Mix just until everything is combined and smooth.
Assembling and Baking
Pour the cheesecake filling over the pre-baked crust, spreading it evenly. Tap the pan gently on the counter to release air bubbles, ensuring a smooth surface during baking.
Bake the cheesecake low and slow, at around 325°F (160°C), until the edges are set but the center still has a slight wobble. This gentle heat helps achieve the creamy texture that makes these bars exceptional.
Once baked, turn off the oven and let the cheesecake rest inside for about 10 minutes with the door slightly open. This helps prevent cracks on the surface.
Cooling and Chilling
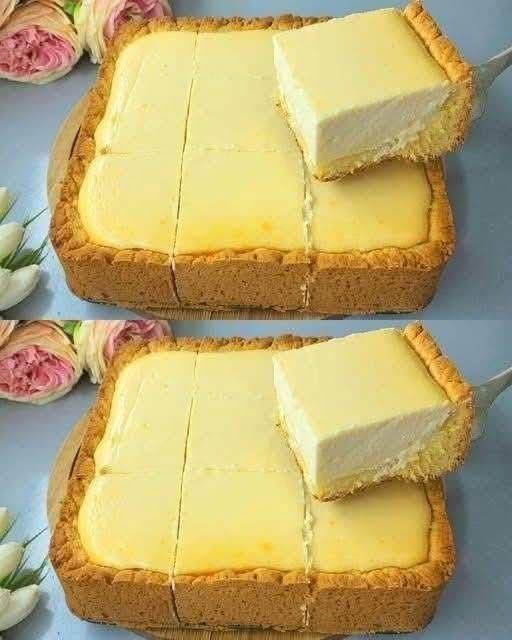
Cooling is one of the most essential steps. Allow the cheesecake to cool completely at room temperature. Transfer it to the refrigerator and let it chill for at least 4 hours—overnight is even better. A well-chilled cheesecake slices neatly and holds its shape, giving you those clean, sharp edges seen in the photo.
Once cooled properly, your cheesecake will develop its full flavor and the perfect firm-yet-creamy consistency.
Cutting and Serving
To achieve picture-perfect slices, dip a sharp knife into hot water, wipe it dry, and make a clean cut. Repeat this process between cuts for flawless results.
Serve the bars as they are for a simple, elegant dessert, or add toppings if you prefer—fresh berries, fruit compote, caramel, or melted chocolate all pair beautifully with the creamy base.
These bars travel well, store well, and stay fresh for several days in the refrigerator. They are ideal for gatherings, work events, celebrations, or simple family desserts.
Storage Tips
- Keep the cheesecake bars refrigerated in an airtight container.
- They stay fresh for up to 5 days.
- For longer storage, they can be frozen for up to 2 months. Wrap each piece individually and place them in a freezer-safe container. Thaw in the refrigerator before serving.
Why This Recipe Works Well for WordPress and SEO
Cheesecake recipes consistently perform well in food-related searches due to high demand. This version has clear instructions, simple ingredients, and a visually appealing result that engages readers. The detailed structure helps search engines understand the content, making it ideal for high-RPM ads. Additionally, the recipe is straightforward, making it popular for home bakers looking for beginner-friendly desserts.